{ biscuitwallah }

biscuits and other heavenly pursuits

June 30, 2010
by nyckid
0 comments

a cool update

Check out the new widget at the top of our sidebar:

Yeah, that’s right. You can subscribe to our blog! Just enter your email in the box to the right, and you’ll get email updates whenever we post a new little thingamadoodle! So go do it right now!! You know you want to…

June 20, 2010
by nyckid
0 comments

marzipan madness!

The other day, my grandpa was coming over. And so, we decided to make him an early father’s day treat: his favorite, marzipan!

It’s really not that hard. It’s mostly fun, actually! Here’s what you’ll need:

  • an assortment of food colorings
  • marzipan (a can, preferably. They have longer shelf lives than tubes)
  • cloves (optional)

That’s pretty much all you need! Here are some helpful tips, though:

  1. When mixing in the coloring, just try to blend it in, as if you were mixing two colors of play doh or something.
  2. After making a couple things, you might want to wash your hands. It makes rolling the marzipan out easier, and you won’t get colors from your last creation mixed into your new one.
  3. The cloves are for making stems in the fruits.
  4. Be creative!!

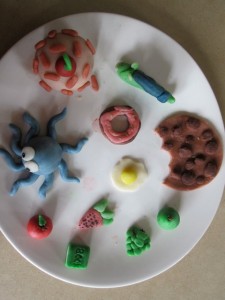
Here are some of ours:

An octopus.

A cupcake.

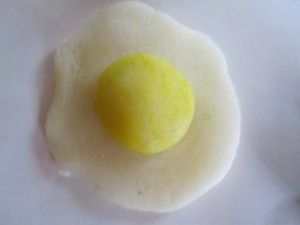
An egg – sunny side up!

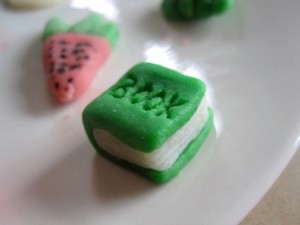
A book, creatively titled “Book”.

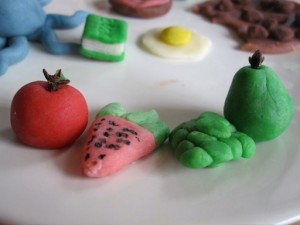
And, some fruit. (see the clove-stems).

So go make some marzipan RIGHT NOW!!!

June 3, 2010
by nycmom
0 comments

farmer t!

So very excited to have received my first box from my CSA which most of you already know is Community Supported Agriculture.  I used to do this year’s ago when it was just me and my sweetie but we couldn’t finish the vegetables and fruits fast enough. Those were also the days of leisurely dinners out.  Decided to try it again as I now have three rebellious hellions for whom it is my motherly duty to force feed vegetables to.  And as for eating out that has become a defense sport in which Aj and I try and shovel down dinner (and a drink!) while simultaneously avoiding hair pulling, hysterical crying and vomiting.

I have never met Farmer T.  From what he has told me he lives this very bucolic life in Massachusetts where he tends his family’s farm and rides around in a wood paneled station wagoney vehicle collecting things to put in my box every week.  And he always has little baby chicks running around his feet in a cute little chicken orbit.  Ok, I made that last part up but it does sound nice.  I’m not sure how his week generally goes but I do know that he drives down on Wednesday morning to make his NYC drop offs and I am drop off #1.  I didn’t quite know what to expect and was hoping it wasnt a lot of swiss chard and kale (which was my experience 13 years ago) and was happily surprised today.  Feast your eyes on this week’s epicurean delights:

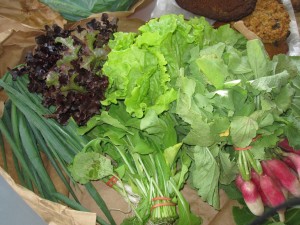
Lovely to look at, no?  In fact, I just arranged it on my dining room table and looked at it for a couple of hours.   Truthfully, there were a few things that I had no idea what they were:

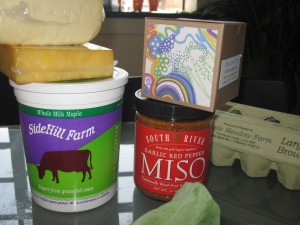
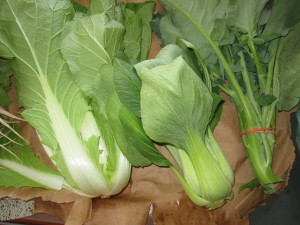
Beautiful pink teeny radishes, bok choy, scallions, two bags of green leafy, two bunches of beautiful lettuce, yogurt, some  smoked cheddar and gouda, garlic red pepper miso, homemade vanilla granola, wild rice, the cutest little box of tea, a dozen farm fresh eggs, a loaf of really -good-for-you bread, a chicken from vermont and some fresh ground beef.  And a bunch of green leafy things that I am not quite sure of what they are but will probably taste really good sauteed with some garlic.

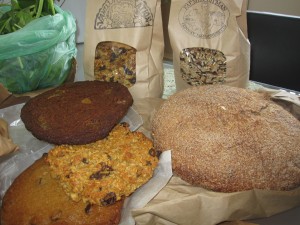
Oh, and 3 cookies each about the size of my head.

chocolate chip, oatmeal raisin and ginger (with real chunks of candied ginger!)

Cookies in my vegetable box?  Now we are talking!  That is my kind of farmer.

It sort of felt a little like Christmas here today with all these new surprises I got to unpack. Looking forward to my 26 weeks of Farmer T.  Thanks to my sister who hooked me up with him.

By the way, in another life Farmer T was a clothes designer in East Hampton.  And now he’s a gentleman farmer.  Like I said, my kind of farmer.

May 21, 2010
by nycmom
1 Comment

doodle for google (and eggs)

Kaira was feeling a bit shy so I thought I would post to my few friends who read this blog  – her entry was one of 2 chosen from New York State for the Doodle for Google contest.  As her history teacher says, brava Kaira!   Basically kids are invited to design the Google home page logo.  The topic this year was:

If I could do anything, I would...

Check out her entry and others here

Sustainable Eating Taking Root
Kaira Mediratta
The Dalton School

And in other news today – and I know this is totally random but I just have to share! – I was in Whole Foods shopping for dinner and look at what I saw!

No, it is not an avocado but an Emu egg!  It costs $29.99 and is the same as 10 chicken eggs!!  Isn’t that amazing?    And quite unglamorously it hails from New Jersey.

May 16, 2010
by nyckid
0 comments

cakeballs! yum yum yum

Hello everyone! Sorry for not posting for a while…haven’t really had the time. Anywhoooo — remember those cakeballs I said that I’d post about? Well here it is!

But wait! I have to tell you about my “cake ball experience”, first:

So. When I first discovered these,the first thing I thought was WOW! WE HAVE TO MAKE THESE! And so, when I had a bakesale at my school, I did! And they tasted pretty good. But the thing was, since nobody knew what they were, they didn’t buy them at the bakesale! And so, when I went home, I was left with a big fat plate of cakeballs. But don’t worry, we put them to good use 🙂 – (aka we ATE them!) And so, for my birthday, I decided to try again, and so for my class, I brought in some cakeballs. And when everyone tried them, THEY WENT CRAZY!! Everyone LOVED them! And they were gone in no time! So. When we had another bakesale (this one for Haiti), I brought in the box of cakeballs that you see here, and because everyone in my class knew of their amazingness, they told all the customers, and the cakeballs sold like hotcakes!!

So. That was my cakeball experience.

Basically, Cake balls are magical little balls of cake that I found on a great baking site by the amazing Bakerella, and let me tell you: they will CHANGE YOUR LIFE! Maybe. I don’t know. But they’re really good! So, I’ll just skip the chitchat, and get to the point!

Ingredients:

  • 1 box of cake mix
  • 1 can of frosting
  • 2 packages of candy melts
  • Sprinkles (optional, but recommended)

Directions:

  1. Bake the cake mix.
  2. After it’s cooled (or you can do it while it’s slightly warm), crumble up the cake into a bowl.
  3. Mix frosting really well into crumbled cake. I recommend using your fingers to do this, even though it’s messy! It makes it a lot easier, and it’s kinda fun!
  4. Use a mini ice cream scooper to make balls out of the cake, and lay them out on a baking sheet lined with parchment paper. We usually get around 90 cakeballs, but if you use a bigger scoop, you don’t have to get as many.
  5. Stick it in the freezer until they are frozen-ish.
  6. Melt one package of candy melts for 30 second intervals in a bowl. You will probably need a second bag later.
  7. Take the cakeballs out of the freezer, and drop 2-4 at a time into the melted candy melts. You can use tongy things to take the cakeballs out of the melts, and to help lay them on the tray. A spoon will probably work, too. Whatever floats your boat.
  8. If you want to, decorate with sprinkles before the melts harden.
  9. Wait for the melts to harden.
  10. ENJOY!!!

P.S. If you’re lucky, you can find RED VELVET CAKE MIX! Like this:

(choir singing)

But I doubt that you’d be that lucky. Because we got it from some other place. Good luck finding it.

March 29, 2010
by nyckid
0 comments

meyer lemon lemonade!

Deeeee-licious! Remember the post that nycmom wrote about her Meyer Lemon Coffee Cake? Well, now we’re working with those mandarin orange/lemon hybrid thingies again! And let me tell you – even though this lemonade is a little sweeter/flavorful, I think it’s just as good, if not better!

Steps (in mostly pix):

Step 1: Find a meyer lemon tree and pick some lemons!

NB: Use a ladder if you can’t exactly reach.

Step 2: Count them – you should have about 12 lemons.

Step 3: Carry them inside…

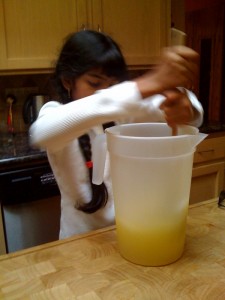
Step 4: Squeeeeeze them!

Step 5: Mix it allllll up!

Or if you want more precise instructions, here’s a recipe for you:

Meyer Lemon Lemonade

Ingredients:

Makes about 4 cups

  • 12 meyer lemons
  • 2 cups of sugar
  • 2 cups of water

Real Steps:

  1. Cut all the lemons in half.
  2. Squeeze them real good with a squeezy thing.
  3. Make sure you don’t have any seeds in the juice.
  4. Mix in all the other ingredients.
  5. Enjoy!

March 26, 2010
by nyckid
0 comments

alice in wonderland (tim burton)

I just saw the movie, Alice in Wonderland, based on the original book by Lewis Carroll. And let me tell you, I was a little disappointed. But that’s just my opinion. I’ll give you a little summary of what the plot was, first:

Easily distracted, but nonetheless imaginative Alice, who is now 19, feels confined in a world of proper manners, and people telling her how to live her life. And when she arrives at a garden party, she isn’t surprised to find that, Hamish, the son of one of her father’s business partners, is planning to propose to her, and all of the guests expect her to accept. But suddenly, just as he asks her, she spots a white rabbit out of the corner of her eye, and runs after it, through the bushes and trees, until she comes to a hole, and falls in.

I think that this movie would have been a lot better, though, if it were the actual story; I just thought that this story wasn’t as good as the first one by Lewis Carroll. And, one other thing I would have liked to have seen would have been an Alice with a hair color other than blonde. But that’s just me.

But now on to the positives: I really liked the costumes, especially The Red Queen’s (look at the pix below) and The Mad Hatter’s (again, look below). And I also liked how it was like “Alice Returns to Wonderland” (though, like I said before, I think the original story was better). Maybe they should have named the movie something else, so that people would be less confused about whether it is the original version or not. And finally, I liked the fact that it was a family movie (that’s always a good quality!) So, all in all, I think this was a nice movie.

March 18, 2010
by nycmom
3 Comments

crack pie is my drug of choice

So…everywhere I look lately there is some reference to this Crack Pie – Martha Stewart, Foodgawker, random blogs.  And then my 28 year old foodie/neighbor/tenant/adopted 4rth child sends me the link also!  And so I’m thinking “This is getting weird.”

So a little background:  There is this insanely popular chef in NYC and his name is David Chang.  He runs three restaurants here and they all have Momofuku in their name which means lucky peach or little peach in Korean (I think).  His newest venture is a place called Momofuku Bakery & Milk Bar which is ALL desserts!  Actually they serve some pork buns and other stuff but you mostly go there for the amazing desserts.  He never takes reservations and there is always a huge line waiting to get in which creates this sort of frenzied atmosphere at all times.  I love it there!  The energy is like a DVF sample sale – you feel the need to rush in and grab the first thing you see and run with it.  Crack Pie is a creation of Momofuku Bakery & Milk Bar.  I have been there but I have not tried the Crack Pie.  But when I kept seeing the recipe repeatedly I took it as a sign that someone was trying to tell me:  BAKE THIS PIE!

So I did.

And let me tell you, this pie does not disappoint.  First off the recipe makes TWO pies which I initially thought was soooo unnecessary.  But I have since changed my opinion on that.  It is a little involved – you have to make a cookie and then crumble it, and then make it into the crust, and then make the filling, and then bake it.  BUT when you taste the pie it is so heavenly you forget the pain it takes to get there.  Sort of like childbirth.   The name is sort of unfortunate but like I told nyckid – it’s called Crack Pie because it sometimes cracks on top when you bake it.  Anywhooo…

On with the pie.  So first you have to make this delicious buttery oatmeal-y cookie on one big sheet.  Which is then cooled and crumbled and processed in a food processor with other deliciousness and pressed into a pie pan to bake for a bit to make the crust.
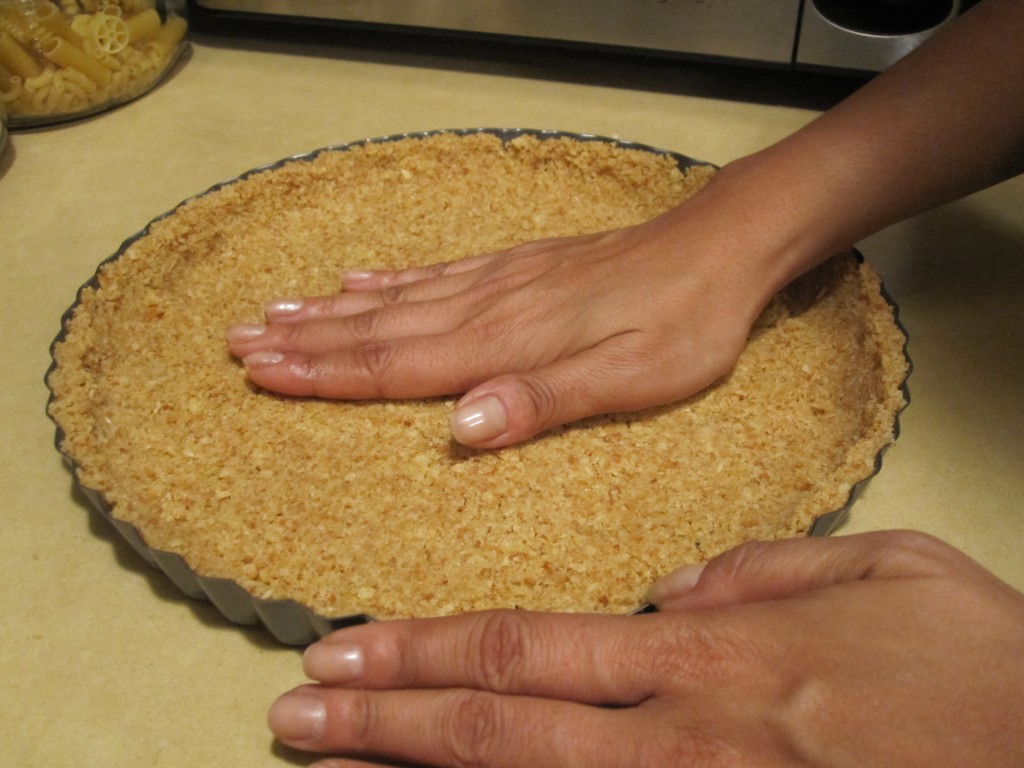
I used a 10 inch tart pan

Then you mix up the filling which is basically a ton of egg yolks, heavy cream, sugar, more sugar, powdered milk, oh and loads of butter.  Can’t really  go wrong with those ingredients.
mixin up the goodies!

You really don’t want to mix it too much because the batter should not really be full and airy – it should be thick and creamy. And then it’s showtime!
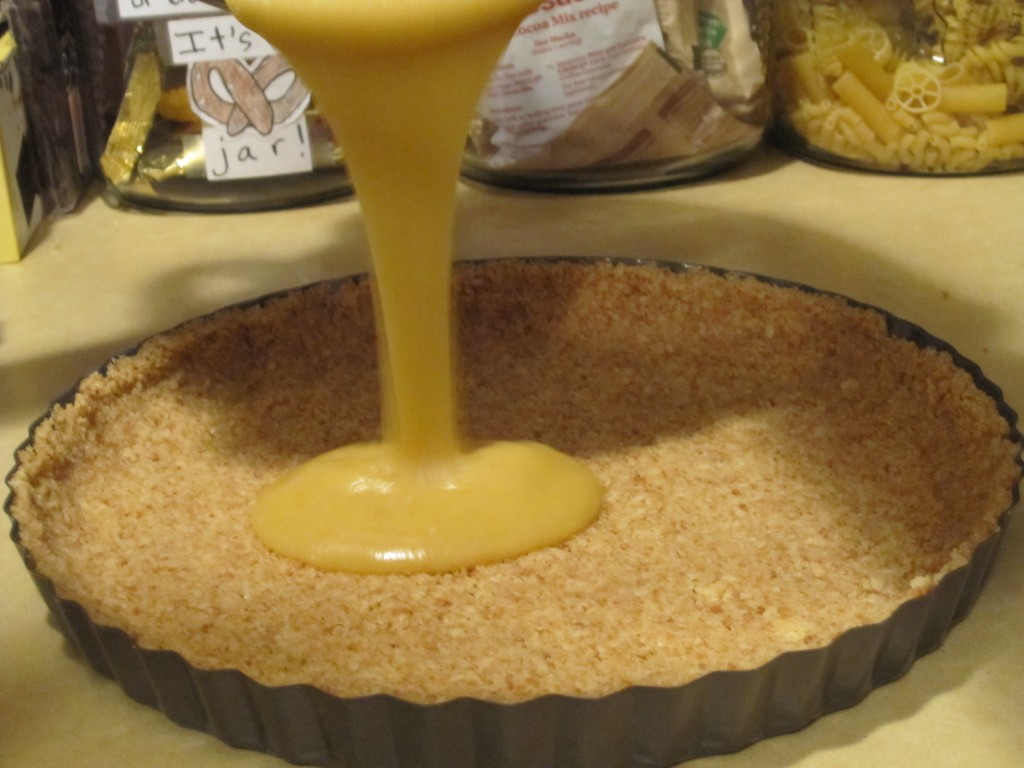
I know, I know. We need to figure out how to take pics without menacing shadows. But you get the idea.

And, that folks, is the final pic of this photo shoot.

Yeah, crazy, huh?  No pic of the final masterpiece.  Which I have to say is not the prettiest girl at the party but it’s mighty tasty. It’s a bit like pecan pie filling without the pecans but smoother and more butterscotch-y and somehow reminded me of condensed milk which I used to lick out of the can with my Dad when I was little and my mom would make Indian desserts with.  But anyway… back on topic. That first bite of it is unassuming …but then it gets you.  Somehow it was like I forgot what was I was doing and just had to eat pie.  I forgot to take pictures.  I ignored my children until that pie was finished.  I forgot to shower and buy groceries.  I just wanted to be home eating pie.  I only had one thing on my mind and it was pie, pie, pie.  Luckily this pie induced behavior only lasted less than 24 hours.

If I didn’t make that pie myself I would swear there was something magic in it…

Momofuku’s Crack Pie

From The Los Angeles Times

Like I said before, this recipe makes 2 pies.  If you use a tart pan with a removable bottom put a sheet of foil or a pan under – I had some errant butter oozing out.  The pie should be served chilled; it tastes better that way – believe me, I know what I’m talking about.  Because it is so thin it comes to room temperature pretty quickly so take out of the refrigerator just before serving.  I foolishly made one the first time – yes I used 1/2 of an egg!  I say make 2 and spread the love!

Cookie for crust:

  • 2/3 cup plus 1 tablespoon (3 ounces) flour
  • Scant 1/8 teaspoon baking powder
  • Scant 1/8 teaspoon baking soda
  • 1/4 teaspoon salt
  • 1/2 cup (1 stick) softened butter
  • 1/3 cup (2 1/2 ounces) light brown sugar
  • 3 tablespoons (1 1/4 ounces) sugar
  • 1 egg
  • Scant 1 cup (3 1/2 ounces) rolled oats

Steps:

1. Heat the oven to 375 degrees.

2. In a medium bowl, sift together the flour, baking powder, baking soda and salt.

3. In the bowl of a stand mixer using the paddle attachment, or in a large bowl using an electric mixer, beat the butter, brown sugar and sugar until light and fluffy.

4. Whisk the egg into the butter mixture until fully incorporated.

5. With the mixer running, beat in the flour mixture, a little at a time, until fully combined. Stir in the oats until incorporated.

6. Spread the mixture onto a 9-inch-by-13-inch baking sheet and bake until golden brown and set, about 20 minutes. Remove from heat and cool to the touch on a rack. Crumble the cooled cookie to use in the crust.

Crust How-To:

  • Crumbled cookie for crust
  • 1/4 cup (1/2 stick) butter
  • 1 1/2 tablespoons (3/4 ounce) brown sugar
  • 1/8 teaspoon salt

1. Combine the crumbled cookie, butter, brown sugar and salt in a food processor and pulse until evenly combined and blended (a little of the mixture clumped between your fingers should hold together). Divide the crust between 2 (10-inch) pie tins. Press the crust into each shell to form a thin, even layer along the bottom and sides of the tins. Set the prepared crusts aside while you prepare the filling.

Filling How-to:

  • 1 1/2 cups (10 1/2 ounces) sugar
  • 3/4 cup plus a scant 3 tablespoons (7 ounces) light brown sugar
  • 1/4 teaspoon salt
  • 1/3 cup plus 1 teaspoon (3/4 ounce) milk powder
  • 1 cup (2 sticks) butter, melted
  • 3/4 cup plus a scant 2 tablespoons heavy cream
  • 1 teaspoon vanilla extract
  • 8 egg yolks
  • 2 prepared crusts
  • Powdered sugar, garnish

Steps:

1. Heat the oven to 350 degrees.

2. In a large bowl, whisk together the sugar, brown sugar, salt and milk powder. Whisk in the melted butter, then whisk in the heavy cream and vanilla.

3. Gently whisk in the egg yolks, being careful not to add too much air.

4. Divide the filling evenly between the 2 prepared pie shells.

5. Bake the pies, one at a time, for 15 minutes, then reduce the heat to 325 degrees and bake until the filling is slightly jiggly and golden brown (similar to a pecan pie), about 10 minutes. Remove the pies and cool on a rack.

6. Refrigerate the cooled pies until well chilled. The pies are meant to be served cold, and the filling will be gooey. Dust with powdered sugar before serving.

Each of 16 servings: 432 calories; 4 grams protein; 45 grams carbohydrates; 1 gram fiber; 27 grams fat; 16 grams saturated fat; 187 mg. cholesterol; 36 grams sugar; 125 mg. sodium.

March 6, 2010
by nyckid
3 Comments

ice cream cones + cupcakes = best idea ever!

Or I guess you could call them ‘Ice Cream Cone Cupcakes’ – just the same, they’re grrrrreat!

So, here’s how it happened:

My brother’s birthday was coming fast. And we needed to bring in a treat for his classmates. So, at first, we thought that we’d make Cakeballs! (A post on these is coming soon, don’t worry!) But, of course, he ‘doesn’t like’ Cakeballs. So, after a million hours on the computer, my mom found this amazing idea…Ice Cream Cone Cupcakes!

So here’s what you need to get if you want to make them (which I highly recommend):

  1. Get some ice cream cones. (not the type with pointy ends; here’s a better recipe for that!)
  2. Get some pre-made icing. Or you can make your own, if you want!
  3. Get a pre-made cake mix. Or if you don’t have one, I’ve included a recipe here:

Cupcake Bakeshop’s Chocolate Cake Recipe

Makes about 40 ice cream cone cupcakes / 350 degree oven (the recipe said that it makes 24, but when we made it,we got more like 40)

Ingredients:

  • 2 cups of flour
  • 2 cups of sugar
  • 1/2 a cup of unsweetened cocoa powder
  • 1 and 1/2 teaspoons of baking soda
  • 1 and 1/2 cups of milk
  • 1/2 a cup of butter
  • 2 teaspoons of vanilla extract
  • 2 eggs

Directions:

  1. Measure out everything except for the eggs directly into your mixer bowl.
  2. Mix on low speed just until it’s all incorporated.
  3. Beat on high speed for 2 minutes.
  4. Add the eggs, and beat on high speed again for 2 minutes.
  5. Transfer the batter into a container with a pour spout.
  6. Pour the batter into ice cream cones, and leave a good half inch between the batter and the top of the cone (or they’ll overflow!)
  7. Bake at 350 for about 20 minutes or until a cake tester comes out clean.

Then comes the fun part – DECORATING! 😀 So just get out your pre-made or home-made icing and your favorite sprinkles, and have fun!